When your clinic tells you that you will be using progesterone in oil for your frozen embryo transfer, the medication itself may not be your first concern. It may be how you are going to inject it.
PIO is usually given as an intramuscular injection into the upper outer area of the buttock. That means reaching a part of your body that can be difficult to see, positioning the needle correctly and keeping it steady while you inject a thick oil-based medication.
If someone will be giving your injections, you may be worried about whether they can do it correctly. If you need to give them yourself, the angle and injection site can make that feel almost impossible.
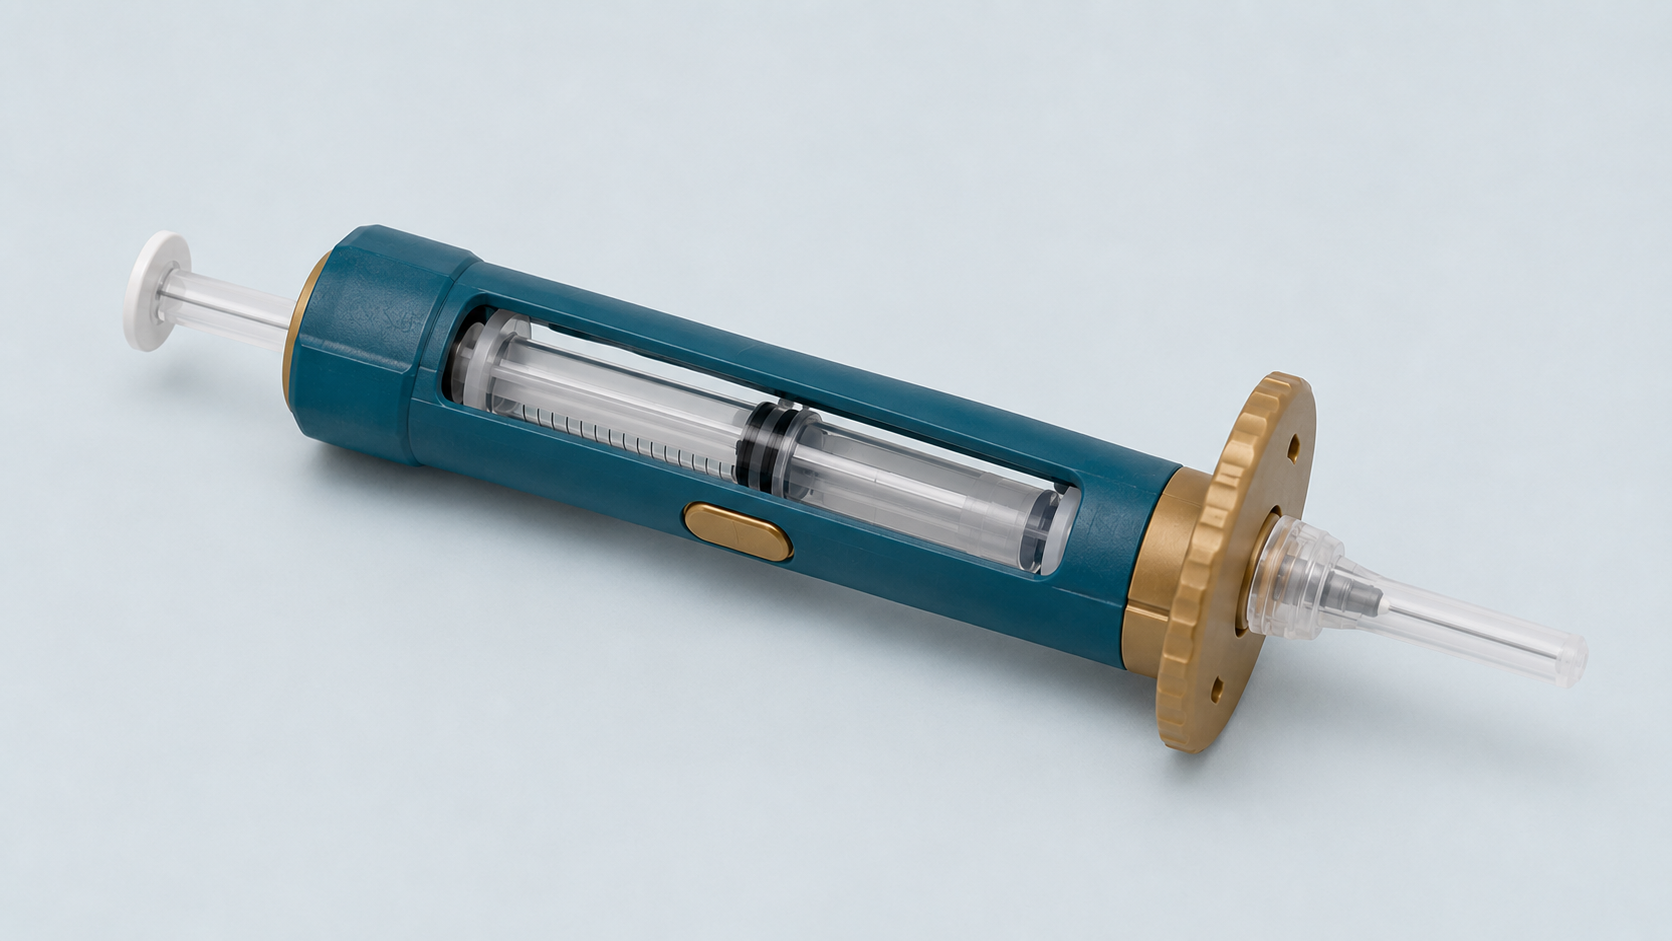
An autoinjector is one option. It can position the syringe and insert the needle at a controlled angle, allowing you to reach the plunger without twisting to manage the needle at the same time.
The right option depends on the device, the syringe and needle supplied with your medication, whether you will be injecting yourself and what your clinic is comfortable for you to use. Understanding those differences before your PIO starts gives you time to choose an approach you can repeat throughout your FET protocol.
Why PIO Injections Can Be Difficult to Give Yourself
PIO is usually injected into the muscle in the upper outer area of the buttock. The injection site sits far enough around your body that it can be difficult to see and reach at the same time.
Giving the injection yourself may require you to twist while holding the syringe at a 90-degree angle, insert the needle, keep it steady and press the plunger. Progesterone in oil is thicker than the medication used for many stimulation injections, so pushing it through the needle can take more pressure and time.
The needle used for an intramuscular injection may also be longer than the needles you used earlier in IVF treatment because it needs to reach the muscle beneath the skin and fatty tissue. Shoulder mobility, hand strength and your ability to maintain the position can all affect how manageable the injection feels.
PIO may be prescribed repeatedly across your FET cycle. Rotating injection sites can reduce repeated pressure on one area, but it also means being able to reach and inject on both sides. The practical difficulty is not simply putting a needle into your skin. It is controlling each part of an intramuscular injection in an area of your body that was not designed to be easy to reach yourself.
Can You Use an Autoinjector for PIO?
Yes, an autoinjector can be used to give PIO when the device is designed for intramuscular injections and is compatible with the syringe and needle supplied for your medication.
You may choose to use one from your first injection or introduce one later if reaching the injection site, inserting the needle or relying on someone else becomes difficult.
The autoinjector holds the prepared syringe and inserts the needle when the device is activated. Your clinic should confirm that the device is suitable and show you how to use it before you use it for the first time.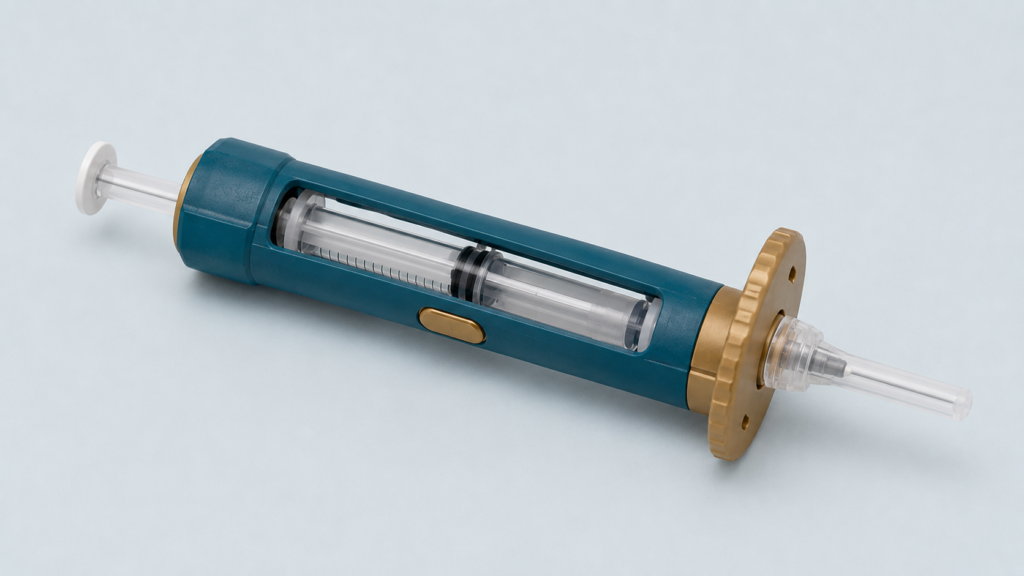
What a PIO Autoinjector Does
A PIO autoinjector controls the part of the injection that can be hardest to perform on yourself: inserting the needle quickly and at a consistent angle.
The prepared syringe is secured inside the device and positioned against the injection site. When the autoinjector is activated, it moves the needle into the muscle in one controlled action.
With devices that automate needle insertion only, you still press the syringe plunger to deliver the PIO and withdraw the needle when the dose has been given. Other devices may work differently, which is why the instructions for the specific model matter.
Not Every Autoinjector Is Suitable for PIO
Autoinjector describes a type of device rather than one standard design. Devices made for insulin pens, pre-filled medication cartridges or short subcutaneous needles are not suitable for PIO injections into the muscle.
A PIO autoinjector needs to hold the separate syringe used to prepare your prescribed dose and accommodate the intramuscular needle supplied for the injection. It must also allow you to control the plunger if the device automates needle insertion but not delivery of the medication.
Suitability therefore depends on the exact device and injection equipment, not simply whether a product is sold as an autoinjector.
Checking the Syringe, Needle and Autoinjector Are Compatible
Before choosing an autoinjector, check the size and type of syringe your clinic has prescribed for PIO. Autoinjectors are usually designed to hold specific syringe capacities and may require a matching adaptor.
Because progesterone is suspended in oil, the injection needle may be wider than the needles you have used for other IVF medications. Needle gauge works in reverse: a lower gauge number indicates a wider needle.
The injection needle must fit within the device and extend far enough beyond its skin-contact guard to reach the muscle. Check the required needle gauge and length as well as the syringe size; a device that holds the syringe does not automatically accommodate every needle used with it.
These details should be compared with the autoinjector manufacturer’s compatibility guide. If anything is unclear, ask your clinic to check the device against the syringe and injection needle you will be using.
How to Use a PIO Autoinjector
Your clinic should first show you the correct injection site and how to prepare your prescribed dose. The way the autoinjector is loaded and activated will depend on the model you are using.
The usual sequence is:
- Prepare the PIO syringe and attach the injection needle as instructed by your clinic.
- Fit the correct syringe holder or adaptor to the autoinjector.
- Secure the prepared syringe inside the device and remove the needle cap.
- Place the device firmly against the marked injection site at a 90-degree angle.
- Activate the autoinjector to insert the needle.
- Press the syringe plunger slowly until the full dose has been given.
- Withdraw the device in a straight movement and dispose of the needle and syringe in a sharps container.
Follow the instructions supplied with your specific autoinjector each time you load it. The manufacturer’s sequence may differ between models.
A PIO Autoinjector Versus a Partner Giving the Injection
A partner can see the injection site clearly, hold the syringe at the correct angle and use both hands without twisting or reaching behind your body. This may work well when they are available at the prescribed injection time and feel confident giving an intramuscular injection.
An autoinjector removes that dependence. It allows you to insert the needle in one controlled movement without needing another person to be present. You still need to prepare the syringe, position the device correctly and press the plunger to deliver the medication.
The practical choice is which method allows your injections to be given correctly and consistently throughout your protocol.
When an Autoinjector May Not Solve the Problem
An autoinjector can automate needle insertion, but it does not remove every difficulty involved in giving PIO.
You still need to prepare the syringe, identify the correct injection site, hold the device firmly in position and press the plunger. If reaching the area or maintaining that position is difficult, you may still need another person to help.
The device also cannot prevent soreness, bruising or firm areas that can develop after repeated injections. Because PIO is thick, pressing the plunger may remain slow or require more pressure than expected.
If pain, swelling or difficulty delivering the dose is becoming worse, ask your clinic to review your injection sites and technique rather than relying on the autoinjector to resolve it.
Choosing How Your PIO Injections Will Be Given
The right approach depends on whether you can reach the injection site comfortably, how you feel about inserting the needle and whether another person can be available when each dose is due.
You may decide to give the injections manually, ask your partner to give them or use a compatible autoinjector. The choice does not have to remain fixed throughout your protocol. If the method you begin with becomes difficult, you can discuss changing how the injections are given with your clinic.
Whichever option you choose, make sure you have been shown the correct injection site and can repeat the process safely before you need to manage it alone.
PIO Provides Progesterone Support for FET
PIO provides progesterone support to help prepare and maintain the uterine lining according to your clinic’s FET protocol.
Before transfer, progesterone changes the lining from a tissue that has been growing under the influence of oestrogen into one that can become receptive to an embryo. The number of progesterone doses given before FET is timed to the developmental stage of the embryo being transferred.
After transfer, progesterone continues supporting the lining while implantation takes place. That hormonal support is essential, but implantation still depends on a wider sequence of biological processes unfolding between the embryo and the lining.
Supporting the Implantation Phase
Implantation has 5 distinct phases and each has to complete successfully for pregnancy to continue
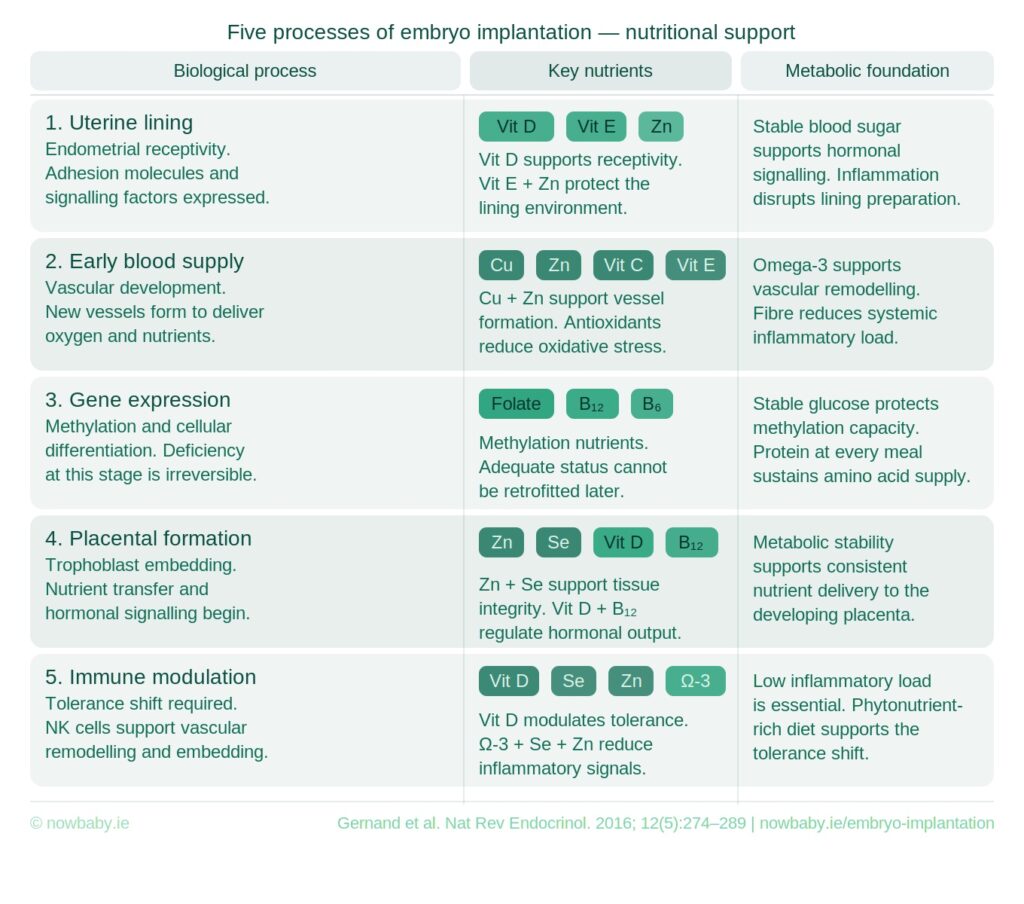
During those stages, cells divide rapidly, genes are regulated, blood vessels begin to develop, the immune system adapts and the earliest placental structures begin to form.
Each of these processes depends on a consistent supply of energy, amino acids, essential fats, vitamins and minerals. Food is how those nutritional raw materials are supplied during the days between transfer and beta.
Your clinic will prepare you meticulously for transfer. You can bring that same level of preparation to meeting the nutritional demands of your embryo at this critical phase.
The Now Baby professionally designed FET Implantation Support Meal Plan takes the guesswork out of this window. It translates the science of the 5-stage implantation process into a structured 14-day food protocol, with every meal designed around the nutritional and metabolic demands between transfer and your beta test.
Get the FET Implantation Support Meal Plan